


Did you know that people around the globe take over 1.8 trillion photos every single year? Despite this huge amount, many mobile images fail to capture true beauty.
This happens because most people rely on harsh bulbs or boring office lamps instead of the sun. I have learned that the sun is the most powerful tool any creator owns.
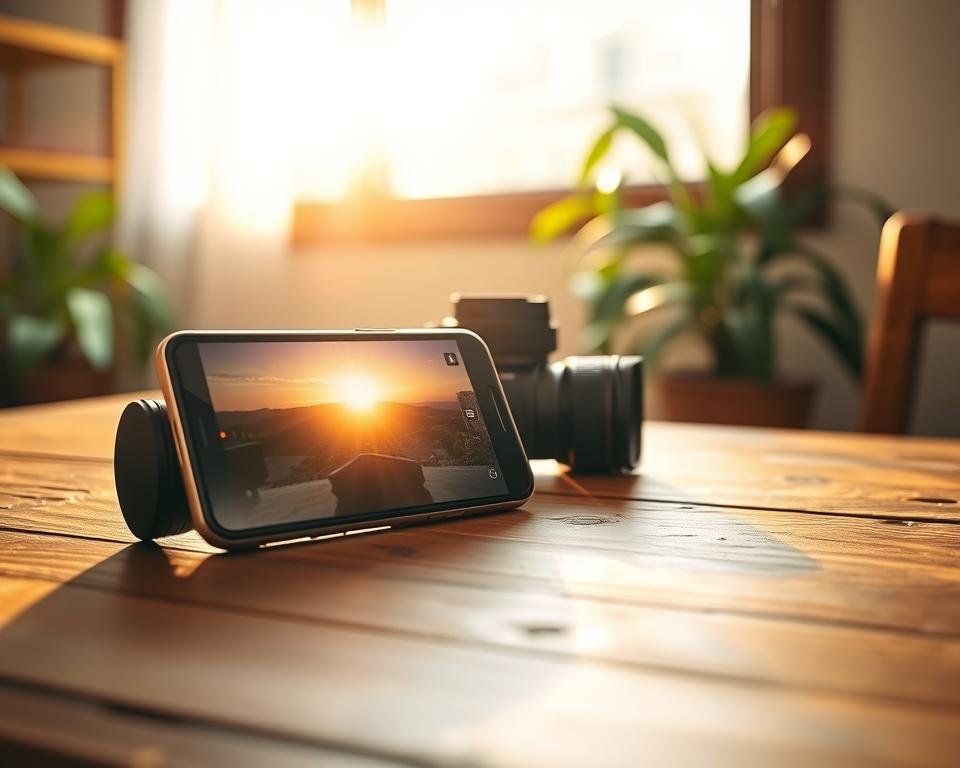
As a big photography fan, I have found that using smartphone natural light can change an average picture into a top shot. It adds a soft feel and depth that expensive gear often misses while keeping colors real.
In this guide, I will share my best tips to help you use these ways. Whether you are just starting or have some skill, you can improve your mobile shots by learning how rays hit your lens.
Key Takeaways
- Identify the best times of day for soft illumination.
- Position your subject to catch the most flattering rays.
- Use simple shadows to create a sense of professional depth.
- Adjust exposure settings to prevent overblown highlights.
- Avoid using the built-in flash for more authentic results.
- Master the golden hour to get warm and glowing tones.
Understanding Natural Light in Photography
Learning about natural light is key to improving your smartphone photos. Natural light can greatly affect your photo’s quality. Knowing how to use it is vital for taking amazing pictures.
What is Natural Light?
Natural light is the light from the sun that isn’t made by humans. It’s the light that surrounds us and is the best for photography. Natural light adds depth, texture, and warmth to your photos, making them more interesting and beautiful.
Types of Natural Light
There are different types of natural light for your smartphone photos. These include:
- Direct sunlight: Harsh and intense, direct sunlight creates strong shadows and highlights.
- Indirect sunlight: Soft and gentle, indirect sunlight is great for showing off small details and subtleties.
- Diffused light: Soft and even, diffused light helps reduce harsh shadows and balances the exposure.
Importance of Natural Light in Smartphone Photography
In smartphone photography, natural light is very important. Using natural light well can improve your photos’ contrast, color, and look. By understanding and using natural light, you can make your phone photos truly stunning.
Best Times of Day for Natural Light
To improve your smartphone photos, knowing when to use natural light is key. The time of day you take photos greatly affects their quality.
The golden hour and the blue hour are the best times for natural light photos.
The Golden Hour
The golden hour happens right before sunset. It’s known for its soft, warm light. This is great for portraits and landscapes with a golden glow.
To get the most out of the golden hour, adjust your phone’s exposure. This helps balance the light.
Blue Hour Explained
The blue hour comes right after sunset. It offers a cool, serene light. It’s perfect for cityscapes, landscapes, and portraits with a blue hue.
During this time, try different angles and compositions. This adds depth to your photos.
Here’s a comparison of the golden hour and blue hour:
| Time | Characteristics | Best For |
|---|---|---|
| Golden Hour (before sunset) | Warm, soft light | Portraits, landscapes |
| Blue Hour (after sunset) | Cool, serene light | Cityscapes, landscapes, portraits |
By using these times, you can improve your smartphone photography. You’ll capture stunning natural light photos with your phone.
Preparing Your Smartphone for Natural Light Shots
To take great photos with natural light, your smartphone needs to be ready. It’s not just about taking a picture. You must set up your device right and use the right tools.
Knowing your smartphone’s camera is key. Not all phones are the same when it comes to taking pictures, even in different light.
Essential Camera Settings
To get the best natural light photos, adjust your camera settings. Here are some important ones:
- Exposure Compensation: This setting helps balance your photo’s brightness. If it’s too bright, lower the exposure. If it’s too dark, raise it.
- ISO: Use lower ISOs (like ISO 100) for bright light. Higher ISOs (like ISO 400 or more) are better for dark places. But, high ISO can make your photos noisy.
- White Balance: This setting makes sure your photo’s colors are right. Natural light changes color, so adjusting this setting can make your photos look more natural.
For more tips on improving your smartphone photos with light, check out 4 ways to improve smartphone photos with.
Recommended Smartphone Models
Some smartphones are better at natural light photos than others. Here are a few top picks:
- Google Pixel Series: These phones are known for their amazing camera work, perfect for natural light.
- Apple iPhone: The latest iPhones, like the iPhone 13 Pro and iPhone 14 Pro, have great camera features for natural light.
- Samsung Galaxy S Series: Samsung’s top models, like the Galaxy S21 and S22, have high-quality cameras for stunning natural light photos.
When picking a smartphone for natural light photos, look for features like optical image stabilization, high-quality lenses, and advanced software.
Techniques for Capturing Stunning Natural Light Photos
Learning to use natural light is essential for amazing smartphone photos. With a few simple tricks, you can make your photos pop. This way, you can take incredible pictures with your phone.
Using Shadows Creatively
Shadows can make your photos more interesting. Instead of avoiding them, use them to your advantage. Shadows can add mystery or highlight parts of your scene.

When it’s sunny, think about where your subject is in relation to the light. Using shadows can make your photos look better. Try placing your subject in the shade or use shadows as a natural frame.
Angling Your Smartphone for Optimal Light
The way you hold your smartphone affects your photos. Try different angles to find the best light. Shooting towards the light can create a beautiful backlight effect.
Don’t be afraid to get low or climb high to find the best light. Changing your view can make your photos more interesting. Also, using HDR can help balance the light and capture more details.
By using these tips, you’ll improve your natural light photos. You’ll show off your creativity and skill in your photos.
Editing Natural Light Photos on Your Smartphone
Editing your natural light photos on your smartphone can greatly improve their quality. With the right techniques and tools, you can enhance your photos’ beauty. This makes them stand out more.
Choosing the right apps is key for editing natural light photos. Lightroom Mobile, VSCO, and Snapseed are popular choices. These apps offer tools and filters to boost your photo’s quality.
Popular Editing Apps
Let’s explore some top editing apps. Lightroom Mobile lets you adjust exposure, contrast, and color balance easily. VSCO adds warmth and character with its unique filters. Snapseed has advanced tools like selective adjustments and healing brushes for detailed edits.
Basic Editing Tips
When editing, remember a few basic tips. First, balance your photo’s brightness and contrast. Use the exposure compensation tool to tweak brightness. Also, adjust the color balance to enhance natural colors.
By following these tips and using the right apps, you can greatly enhance your natural light photos. They will become truly special.
Finding the Perfect Location
Finding the perfect spot is key for taking amazing photos with your smartphone. The location greatly affects the quality of your natural light images. Whether outdoors or indoors, the setting is vital for stunning smartphone photos.
Understanding the best lighting for photos is important. The way light interacts with the surroundings can make or break your photos.
Outdoor Versus Indoor Lighting
Outdoor lighting is dynamic and engaging. It ranges from the soft, warm tones of the golden hour to the harsh midday sun. Natural light outdoors can add depth and character to your photos, making them more captivating.
Indoor lighting gives you more control over the lighting. You can adjust the light sources, intensity, and direction. But, indoor lighting can seem more static and less engaging than outdoor lighting.

Urban vs. Nature Settings
Urban settings offer a unique mix of architecture, culture, and human activity. They provide a rich backdrop for your photography. The contrast between natural light and the urban landscape can create visually striking images.
Nature settings offer endless opportunities for stunning natural light photos. From serene forests to dramatic coastlines, nature provides a wealth of photographic opportunities.
In conclusion, capturing exceptional smartphone natural light photos depends on understanding and using your environment. By choosing the right location and being mindful of lighting, you can take your mobile photography to new heights.
Tips for Portraits in Natural Light
Using natural light is key for taking stunning portraits. It makes the subject’s features pop and gives photos a natural feel. To get this right, it’s important to know how to work with natural light when taking portraits with your smartphone.
Positioning Your Subject
Getting your subject’s position right is vital for great portraits in natural light. You want them in a spot where the light is soft and flattering. For example, during the golden hour, near a window or in the shade outside can give beautiful, soft light that highlights their features.
Think about the light’s direction when setting up your subject. Avoid direct light, as it can cause harsh shadows or unflattering highlights. Instead, aim for a 45-degree angle to your subject for a more dimensional and interesting effect.
Reflecting and Diffusing Light
Not all natural light is perfect for portraits. But, you can soften harsh light using reflection and diffusion. A reflector can bounce light onto your subject’s face, reducing shadows and adding depth. A diffuser can also soften the light, making it gentler on your subject’s features.
For more tips on taking better natural light portraits, check out this guide on taking better natural light classic portraits. By using these techniques and trying different lighting setups, you can greatly improve your mobile photography skills and capture stunning portraits in natural light.
Common Mistakes to Avoid
To improve your smartphone photos, know the common mistakes that can ruin your natural light shots. Capturing natural light with your phone can be tough. But, knowing what to avoid can greatly enhance your photos.

Overexposure and Underexposure
Getting the exposure right is a big challenge in natural light photography. Overexposure can make bright areas lose details. On the other hand, underexposure can make shadows dark and muddy.
To fix this, adjust your smartphone camera settings for natural light. Tap on your subject’s area on the screen to change the exposure. This small change can greatly improve your photos.
Ignoring the Environment
Another big mistake is not considering the environment around your subject. The surroundings can either add to or take away from your photo. Make sure to avoid distracting backgrounds and adjust your angle or position for a cleaner shot.
Also, think about the time of day and how the natural light affects your environment. For example, the golden hour offers soft, warm light that can enhance your photos. But, harsh midday sun can create unflattering shadows.
Showcasing Your Work
Now that you’ve mastered the art of capturing stunning natural light photos with your smartphone, it’s time to share them with the world. Enhancing pictures with natural light is just the first step; showing off your work is where the magic really happens.
Sharing your photography on the right platforms can really boost your skills. Instagram and Flickr are great for photographers. These sites let you get feedback, gain recognition, and stay motivated to keep improving your smartphone photography skills.
Social Media Platforms for Photographers
Instagram is a great place to start, with its huge community of photography fans. Use relevant hashtags to get more people to see your work. Flickr, on the other hand, is all about photography, with a community that loves the art.
Building Your Portfolio
Having a portfolio is key for any photographer. It shows off your best work and your style. You can make a portfolio on your own website or use sites like Behance or 500px. By showing off your natural light photography, you’ll attract people who like your work and maybe even new opportunities.