


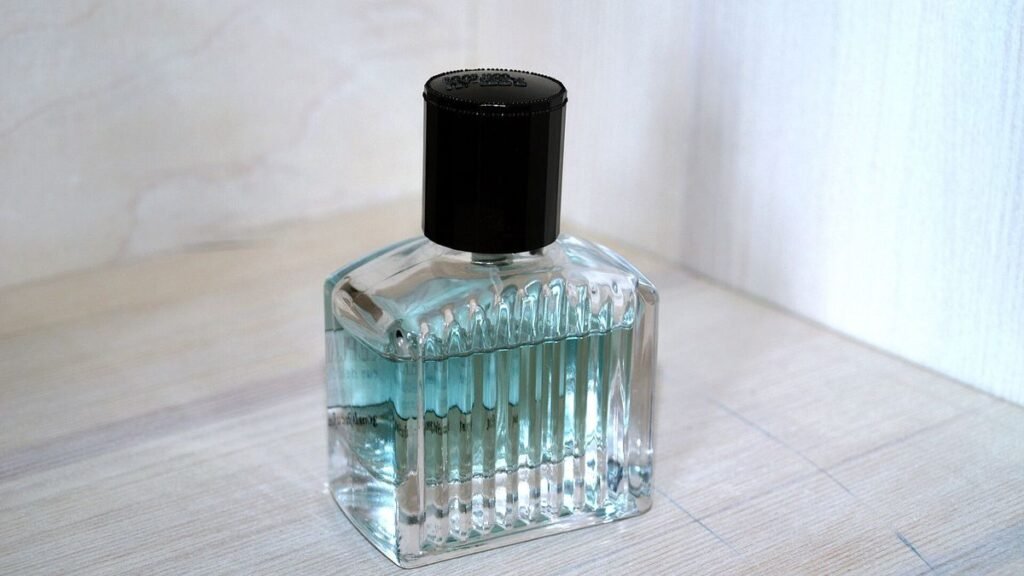
Glass is one of the hardest things to photograph with a phone. A perfume bottle, a candle jar or a drinking glass reflects every lamp, window and phone screen in the room, and when you try to light it from the front it turns into a flat, gray shape full of hot spots. The good news is that glass becomes easy once you stop lighting the object and start lighting what is behind it.
In this guide you will learn why glass behaves differently from other products, two simple lighting setups that work with a single window or lamp (bright-field and dark-field), how to control reflections with cardboard and paper, which phone settings help, and the most common mistakes that ruin glass shots.
Why glass needs a different approach
Most products are lit by bouncing light off their surface. A mug, a shoe or a wallet reflects some light back to the camera, and that is what you see in the photo. Glass mostly does not do that. Light passes through it, bends at the edges and reflects like a mirror on the curved surfaces.
That has two practical consequences:
- The background becomes part of the product. Whatever sits behind the glass shows through it. A cluttered shelf behind a jar will appear inside the jar.
- The shape of the glass is defined by its edges. Viewers recognize a bottle by the thin lines along its sides, shoulders and base. Your job is to make those edges either clearly dark or clearly bright.
So instead of asking “how do I light this bottle?”, ask “what should the bottle be reflecting and refracting?” That shift is the whole trick.
Setup 1: bright-field lighting (light background, dark edges)
Bright-field lighting gives the classic clean look you see in catalog photos: a glowing white or pale background with crisp dark outlines around the glass. It is the best starting point for e-commerce listings.
What you need:
- One light source behind the product: a window with daylight, a desk lamp or an LED panel.
- A sheet of white paper, tracing paper or a thin white shower curtain to diffuse it.
- Two pieces of black cardboard or black foam board.
- A clean table or a sheet of glass or glossy acrylic if you want a reflection under the product.
How to set it up:
- Place the diffuser (paper or curtain) between the light and the product, so the light glows evenly through it. The diffuser should be larger than the product in the frame.
- Put the product about 30 to 60 cm in front of the diffuser. The farther the product is from the background, the softer and more even the glow behind it.
- Position the phone in front of the product, so the bright diffuser fills the whole frame behind it.
- Look at the edges. If they look thin or weak, place the black cards just outside the frame, on the left and right of the product. The glass will reflect the black cards and the edges will become darker and sharper.
- Move the black cards closer to or farther from the product until the outline looks even on both sides.
This setup also works for liquids. Amber whiskey, green olive oil or pink perfume will glow with rich color when backlit, because the light passes through the liquid on its way to the lens.
Setup 2: dark-field lighting (dark background, bright edges)
Dark-field lighting is the opposite: a black background with the glass outlined by bright lines. It looks dramatic and premium, and it works well for social media posts, wine glasses and clear bottles.
How to set it up:
- Start with the same diffused light source behind the product.
- Place a smaller piece of black cardboard directly behind the product, between it and the diffuser. From the phone’s point of view, the black card should cover the area right behind the glass, while the bright diffuser still shows around the edges of the card.
- Adjust the size or distance of the black card until only a thin rim of light wraps around the glass. A card that is too large hides the edges; one that is too small lets the light flood into the middle.
- Lower the exposure on your phone until the background is truly black and the edges are bright but not blown out.
A useful trick: if the black card is too big for the shot, move it closer to the light and farther from the product. If it is too small, move it closer to the product. You are changing how large it appears behind the glass.
Controlling reflections with simple tools
Even with backlight, curved glass reflects the room in front of it. That is how you end up with a tiny window, a ceiling lamp or your own hand visible on the side of a bottle. A few habits keep those reflections under control:
- Turn off other lights in the room. One clean light source is easier to manage than three mixed ones. Mixed lights also create different colors on the glass.
- Use black cards in front, too. If you see a bright spot on the front of the glass, find what it is reflecting and block it with black cardboard placed out of frame.
- Add a controlled highlight on purpose. A long, narrow strip of white paper placed to the side can create a clean vertical highlight that shows the bottle is round and shiny. One deliberate highlight looks professional; random ones look messy.
- Hide the phone. On very reflective products, cut a small hole in a black card for the lens and shoot through it. The card will hide the phone and your hands.
- Change the angle slightly. Moving the phone just a few centimeters up or down often moves a reflection off the important part of the product.
Phone settings and preparation that make a difference
Lighting does most of the work, but a few camera habits help glass look sharp and clean:
- Clean the product and the lens. Fingerprints and dust are much more visible on backlit glass than on any other material. Wear cotton gloves or hold the product by the base, and wipe it with a microfiber cloth right before shooting. Wipe the phone lens too.
- Use a tripod or a steady support. Backlit setups often need lower exposure, and any shake blurs the thin edges you are trying to show.
- Lock focus and exposure. On most phones, you can tap and hold on the product to lock focus and exposure. Focus on the label or the front edge, not on the background.
- Adjust exposure manually. In bright-field shots, slide exposure up until the background is white but the edges still have detail. In dark-field shots, slide it down until the background is deep black.
- Avoid the ultra-wide lens up close. It bends straight lines and distorts bottles. Step back and use the main or telephoto lens, then crop if needed.
- Shoot at the product’s height. For bottles and glasses, an eye-level angle keeps the sides straight and the shape true. Shooting from above makes the opening look oval and the base disappear.
Common mistakes with glass products
These are the problems that show up most often, and how to fix them:
- Using the phone flash. Direct flash bounces off the front of the glass and creates a harsh white spot. Turn it off and use backlight instead.
- Lighting only from the front. Front light makes clear glass look gray and flat. Move the light behind or to the sides.
- A busy background. Patterns, furniture or text behind the product show through the glass. Keep the background plain and evenly lit.
- Weak edges. If the glass seems to disappear into the background, add black cards (bright-field) or adjust the black card behind the product (dark-field).
- Bubbles and smudges in liquids. Fill bottles slowly, let bubbles settle, and wipe any drips on the outside before shooting.
- Over-editing. Pushing clarity and contrast too far creates halos around the edges. Small adjustments to exposure, white balance and highlights are usually enough.
A quick workflow you can repeat
Once you have tried both setups, glass photos become a routine. A simple sequence:
- Clean the product and the lens.
- Choose the look: bright-field for clean catalog shots, dark-field for dramatic shots.
- Set up one light behind a diffuser and turn off other lights.
- Place the phone on a tripod at product height and frame the shot.
- Add black cards to define the edges and block unwanted reflections.
- Lock focus and exposure, then adjust exposure until the background looks right.
- Take several shots, moving the cards a little between them, and compare on a larger screen.
- Edit lightly: straighten, crop, fine-tune exposure and white balance, and remove any dust spots.
Summary
- Glass is defined by its edges and by what sits behind it, so light the background instead of the product.
- Bright-field lighting (bright background, black cards at the sides) gives clean catalog shots with dark outlines.
- Dark-field lighting (black card behind the product, light around it) gives dramatic shots with bright outlines.
- Control reflections with one light source, black cards, deliberate white highlights and small angle changes.
- Keep the product and lens spotless, use a tripod, lock focus and exposure, and avoid the flash and the ultra-wide lens.
With a window, a sheet of paper and two pieces of black cardboard, you can make a simple glass jar look as clean as a studio product shot.
Photo: Perfume glass bottle, by Santeri Viinamäki, license CC BY-SA 4.0, via Wikimedia Commons. Cropped.