


Did you know that people take over five billion photos every day? This shows how much we love capturing moments with our phones. But, many photos don’t get shared because they look dull or poorly lit.
I’ve found that photo editing is key to making photos look great. I’m excited to share how easy it is to improve your photos with simple tools. Mobile retouching lets me enhance colors and fix shadows on the go.
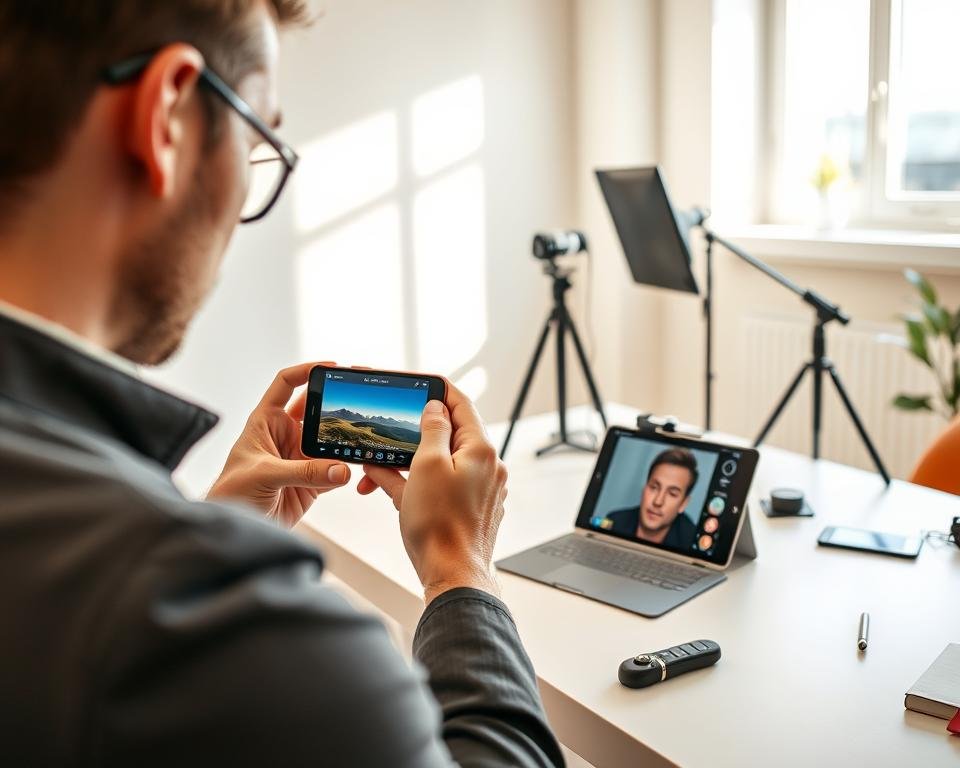
I don’t need a big computer setup to take amazing photos anymore. My aim is to show that anyone can get great results with a little help. You don’t need special skills to make your photos look absolutely fantastic.
With the right software, you can show off the beauty in your life. Let’s start this journey to better photography. Soon, you’ll see how easy it is to turn your photos into masterpieces.
Key Takeaways
- Modern smartphone tools provide professional results almost instantly.
- Basic lighting and color adjustments significantly improve overall image quality.
- You do not need expensive computer equipment to create great art.
- Enhancing your photos helps you tell a much more compelling story.
- Simple, user-friendly apps make these techniques accessible for everyone.
- Quick digital fixes can easily save snapshots that were poorly lit.
What is Mobile Retouching?
Smartphone editing services have become popular. Knowing about mobile retouching is key for photographers and social media fans. It’s about editing and improving photos on a mobile device.
Mobile retouching includes simple tweaks like adjusting brightness and contrast. It also covers more complex tasks like removing spots or changing facial features. The aim is to make the photo look better and more appealing.
Understanding the Basics
At its heart, mobile retouching is about image enhancement. It uses tools and techniques to make photos look their best. You can do simple edits or more detailed work, depending on what you want.
To start with mobile retouching, learning the basics of photo editing is key. Knowing how to tweak exposure, contrast, and color balance is important. These skills will help you get better results.
The Importance of Mobile Retouching
Mobile retouching is vital because it lets us enhance our photos quickly and efficiently. In today’s fast world, being able to edit and share great photos on the go is priceless.
Whether you’re a pro photographer or just love sharing photos on social media, mobile retouching is essential. It helps you make your photos stand out by ensuring they’re top-notch. This skill is more important than ever in our digital age.
Tools I Use for Mobile Retouching
I’ve tried many photo retouching apps and I’m excited to share my favorites. As a mobile photographer, I need tools that are powerful, intuitive, and easy to use.
The right photo retouching app can really improve my photos. I’ve tried different apps and I’m amazed at their mobile photography editing skills.
Top Mobile Apps for Easy Retouching
Some of my favorite apps for mobile retouching are:
- Adobe Lightroom Mobile: It has powerful editing tools and is easy to use.
- Facetune: It’s great for portrait photographers because of its advanced retouching features.
- Snapseed: It has a wide range of tools and filters to enhance photos.
These apps are key in my mobile photography workflow because they’re versatile and easy to use.
Features I Look for in Retouching Apps
When I choose a retouching app, I look for certain features:
- Layer support: It lets me do more complex edits and gives me flexibility.
- Selective adjustments: It lets me control specific parts of the image precisely.
- User-friendly interface: It saves time and makes learning easier.
By focusing on these features, I can get professional-looking results without needing a lot of editing experience.
My Favorite Techniques for Retouching
I’ve developed a set of favorite retouching techniques. These methods have been honed through practice and experience with digital touch-up and professional mobile editing. My approach to retouching involves a combination of making the image look better and precise edits.
Enhancing Colors and Contrast
Adjusting colors and contrast is the first step I take in retouching a photo. This can significantly change how the image looks. I use mobile apps with tools for adjusting colors and contrast levels.
For example, I might use the ‘Curves’ tool to fine-tune brightness and darkness in specific areas.

To show the impact of color and contrast adjustments, here’s a comparison:
| Before Retouching | After Retouching |
|---|---|
| Dull colors | Vibrant colors |
| Low contrast | High contrast |
| Flat appearance | Dynamic appearance |
Removing Blemishes Effectively
Removing blemishes and imperfections is another key part of retouching. I use tools like the ‘Spot Healing’ brush and the ‘Clone Stamp’ tool for this. The goal is to be subtle and avoid over-editing, which can make the image look unnatural.
For more detailed guidance on retouching, I recommend checking out resources like this guide on professional mobile retouching. It offers valuable tips and techniques.
How Mobile Retouching Saves Time
Mobile technology has made online photo retouching faster than ever. I edit photos often and see how much time mobile retouching saves.
Mobile retouching lets me edit photos anywhere, anytime. This is great when I’m traveling or away from my computer. Being able to edit photos instantly on my phone has really improved my workflow and saved me a lot of time.
Quick Edits on the Go
Mobile retouching is all about quick edits. With the right apps, I can enhance colors, adjust brightness, and remove blemishes in a few taps. This not only saves time but also lets me share edited photos faster.
Some key features for quick edits include:
- Intuitive user interfaces
- One-tap adjustments for common edits
- Preset filters and effects
Efficient Workflow Tips
To work more efficiently, I follow a few tips:
- Batch similar edits together to save time.
- Use presets and templates for consistent looks.
- Keep my mobile retouching apps organized and easy to find.
These strategies help me save a lot of time on retouching tasks. Here’s how mobile retouching compares to desktop methods:
| Task | Desktop Retouching Time | Mobile Retouching Time |
|---|---|---|
| Basic Edits (Brightness, Contrast) | 10 minutes | 3 minutes |
| Advanced Edits (Blemish Removal) | 20 minutes | 8 minutes |
| Batch Editing (10 photos) | 60 minutes | 20 minutes |
As the table shows, mobile retouching cuts down editing time a lot. It’s a must-have for photographers and editors wanting to speed up their work.
Common Mistakes to Avoid in Retouching
Editing photos on my mobile has taught me a lot. I’ve found some mistakes that can ruin your photos. Mobile editing is great for improving your photos, but it’s easy to mess up.
One big challenge is finding the right balance. Over-editing can make photos look fake and take away from the subject.
Over-editing: Less is More
Many times, over-editing has ruined a good photo. The trick is to make small changes that improve the photo without looking fake. For example, adjusting brightness and contrast too much can make a photo look unnatural.
“The art of editing is not just about making changes; it’s about making the right changes.”
To avoid over-editing, knowing when to stop is key. Here are some tips:
- Take breaks from editing to look at your photo with fresh eyes.
- Compare your edited photo with the original to ensure you’re not overdoing it.
- Make small adjustments and check the results before making further changes.
Ignoring Natural Skin Textures
Another mistake is ignoring skin textures. Skin texture is a key part of a person’s look, and removing it can make them look unnatural or fake.
When editing portraits, keeping the skin’s natural texture is important. Here’s a simple table to show the difference:
| Feature | Over-Edited | Naturally Edited |
|---|---|---|
| Skin Texture | Completely smooth, lacking texture | Retains natural texture and pores |
| Facial Features | Overly smoothed, losing definition | Enhanced while maintaining natural definition |
By avoiding these common mistakes, you can get a more natural look in your mobile editing. Remember, the goal is to enhance your photos, not change them completely.
The Power of Filters in Mobile Retouching
Filters are a powerful tool in mobile retouching. They allow for quick and dramatic changes to a photo’s mood and look. By applying the right filter, you can greatly enhance your images’ visual appeal.
I often use filters to give my photos a unique touch. Whether it’s for a vintage look or to enhance natural colors, filters can significantly impact an image’s overall effect.

When to Use Filters
Knowing when to use filters is key for effective mobile retouching. Filters are great when you want to create a specific mood or atmosphere in your photo.
For example, a warm filter can add a cozy feel to a landscape photo. On the other hand, a cool filter can give a portrait a serene look. This is a key aspect of image enhancement, as it lets you tailor the mood of the image to your vision.
Customizing Filters for Unique Looks
One of the big advantages of using filters in mobile retouching is the ability to customize them. Most retouching apps let you adjust the filter’s intensity and other parameters to fit your image.
By tweaking these settings, you can achieve a look that’s uniquely yours. This enhances the image without making it look overly processed. This level of control is essential for achieving high-quality image enhancement.
Retouching for Different Types of Photos
As a mobile retouching enthusiast, I’ve learned that the key to great results lies in understanding the specific needs of each photo type. Different photos demand different retouching strategies. This is essential for achieving professional-looking results on mobile devices.
When retouching photos on a mobile device, it’s essential to consider the subject and context of the image. For instance, retouching a portrait involves different techniques compared to a landscape photo. Understanding these differences is key to producing high-quality results.
Portraits: Making Faces Shine
When it comes to portrait retouching, the goal is often to enhance the subject’s features while maintaining a natural look. This involves subtle adjustments to skin tone, removing blemishes, and making the image clearer.
- Skin smoothing: Removing minor imperfections without losing the natural texture.
- Eye enhancement: Brightening the eyes and making them more vibrant.
- Color correction: Ensuring the skin tones are natural and pleasing.
For portraits, it’s also important to pay attention to the background. A cluttered or distracting background can detract from the overall impact of the photo.
Landscape Photos: Enhancing Natural Beauty
Landscape photos require a different approach. Here, the focus is on making the natural beauty of the scene stand out without over-manipulating the image. This can involve adjusting the contrast, making colors more vivid, and ensuring the composition is balanced.
Some key techniques for landscape retouching include:
- Adjusting the exposure to bring out details in both the shadows and highlights.
- Enhancing the colors to make the scene more vivid and engaging.
- Removing any distractions or unwanted elements from the scene.
By applying these techniques, you can significantly improve the quality of your landscape photos. They will become more captivating.
Ideas for Creative Mobile Retouching
Mobile retouching is more than fixing flaws; it’s a creative journey. It lets you explore endless possibilities. I’m excited to share some innovative ideas that can take your photos to new heights.
Mobile retouching lets you try new and exciting things. You can use apps like Lightroom mobile to edit on the go. For more tips, check out 6 Lightroom mobile editing tips.
Experimenting with Unconventional Techniques
Trying new techniques is key to mobile retouching. It means using unusual filters and layer blending modes. You can even mix digital art into your work.
Here are some techniques to try:
- Use double exposures to merge two images, creating a surreal look.
- Try selective color to highlight parts of your photo while fading the rest.
- Play with texture overlays to add depth and interest.
Incorporating Digital Art Elements
Adding digital art to your retouching can make your work more creative. You can add subtle textures or transform your image into digital art.
Here are some digital art elements to try:
| Element | Description | Effect |
|---|---|---|
| Digital Brush Strokes | Adds a painterly effect to your photos | Creates a more artistic, less realistic look |
| Glitch Art | Incorporates errors and distortions into your image | Adds a futuristic, edgy feel |
| Surreal Landscapes | Transforms ordinary scenes into fantastical worlds | Evokes a sense of wonder and imagination |
By exploring these creative ideas, you can unlock mobile retouching’s full power. You’ll create images that are not just stunning but also uniquely expressive.
Building My Retouching Skills
My journey to become good at professional mobile editing has been a mix of learning and doing. I’ve had to look for many resources to improve.
Online courses and tutorials have been key for me. They give clear steps and new techniques for mobile editing.
Online Courses and Tutorials
Online platforms have helped me a lot with mobile retouching. The benefits are:
- Many tutorials and courses for all skill levels.
- Learning at my own pace and going back to hard topics.
- Talking with instructors and other learners online.
Udemy, Coursera, and Skillshare are great for learning. They have courses from top photography and editing pros.
Annie Leibovitz said, “The camera is an instrument that teaches people how to see without a camera.” Online courses have shown me how to see my photos’ full value through editing.
“The camera is an instrument that teaches people how to see without a camera.”
Learning From Other Photographers
I’ve also learned a lot from other photographers and editors. By looking at their work, I’ve added new ideas to mine.
Here’s how I’ve learned from others:
- Following their work on social media to see their latest projects.
- Going to workshops and seminars to hear their stories.
- Talking in online forums and communities about their methods.

By mixing formal learning with insights from others, I’ve greatly improved my skills. I stay current with mobile editing trends too.
Showcasing My Retouched Photos
Thanks to a photo retouching app, my photography has reached new levels. Now, I’m excited to share my work with everyone. It’s not just about showing off; it’s about sharing stories and connecting with others.
As I get better, I know how important it is to show my best work. I create a portfolio with my top photos. Then, I share them on social media to reach more people.
Creating a Portfolio of My Work
Building a portfolio is key for me as a photographer. It lets me show off my best work and what I can do. I pick images that show my skills and tell a story or make people feel something.
To make a great portfolio, I think about a few things:
- I choose a variety of images to show my range.
- I make sure each photo is top-notch and well-retouched.
- I organize my portfolio so it’s easy to follow and looks good.
Sharing on Social Media Platforms
Social media is a big help for photographers to share their work. I use Instagram and Facebook to show off my photos and talk to my followers.
Here are some tips for sharing on social media:
- I post high-quality images that look good on each platform.
- I use the right hashtags to get more people to see my work.
- I chat with my followers by answering comments and messages.
By showing my photos in a portfolio and being active on social media, I can share my passion. This helps me grow as a photographer.
The Future of Mobile Retouching
The world of mobile retouching is on the verge of a big change. This is thanks to new tech and what people want. Mobile photography editing and online photo retouching will keep being key in how we make and share photos.
Trends I’m Excited About
There are some trends in mobile retouching that really excite me. For one, AI in editing apps is making top-notch edits possible on phones.
I’m really looking forward to the growth of AI-powered editing tools. These tools can tweak things like brightness and contrast automatically. This saves a lot of time and effort.
This mix of tech and human touch will change what’s possible in mobile retouching.
The Impact of AI on Mobile Editing
AI is changing mobile editing in many ways. It automates simple tasks and opens up new creative doors.
| Feature | Traditional Editing | AI-Assisted Editing |
|---|---|---|
| Time Required | More time-consuming | Faster and more efficient |
| Skill Level | Requires advanced skills | More accessible to beginners |
| Precision | Manual adjustments can be imprecise | AI can offer more precise edits |
Final Thoughts on Mobile Retouching
Reflecting on my mobile retouching journey, I see it’s more than editing photos. It’s about making the story in each image shine. With new smartphone editing services, the ways to enhance images are limitless.
Personal Approach to Retouching
I focus on making subtle changes that keep the image true to itself. This philosophy has helped me create a style that connects with people.
Exploring Creativity
Try out different techniques and tools to find your unique voice in mobile retouching. Whether using smartphone apps or editing services, the most important thing is to enjoy the process. This way, you’ll not only get better but also find new ways to share your creativity through photos.