


Did you know 93% of online shoppers choose based on what they see? This shows how important lighting and mood are in my work. Making professional product images is not just about the tools; it’s about leaving a mark on your viewers.
I use bright, shadow-free setups to make my subjects look clean and fresh. Learning to take high-key product shots helps me create a polished style. This style showcases every detail of the item beautifully.
This guide aims to help you get these results with the right tools and methods. I’ll share the knowledge to boost your skills. By the end of this article, you’ll be confident in creating bright, top-notch images.
Key Takeaways
- Bright lighting creates an airy and inviting atmosphere for shoppers.
- Soft light sources are essential to minimize harsh or distracting shadows.
- Proper exposure control ensures the background stays perfectly white.
- Consistency across your gallery builds strong professional trust with customers.
- Minimalism helps the main subject stand out effectively on the screen.
Understanding High-key Photography
High-key photography is key to making product images bright and evenly lit. It uses a lot of light to make the subject look good without shadows. This style is great for showing off products in a clean and attractive way.
What is High-key Photography?
High-key photography is all about bright, airy images. It uses lots of light to make sure the subject is well-lit. This makes the image look good and appealing.
“The key to a great photograph is not just the camera, but the eye behind it.”
In high-key photography, the eye is drawn to the subject because of its bright and even lighting.
The Difference between High-key and Low-key
High-key and low-key photography differ mainly in lighting. High-key uses lots of light to reduce shadows. Low-key uses less light, making shadows more dramatic. High-key is perfect for product photography to show products clearly and attractively.
When to Use High-key Techniques
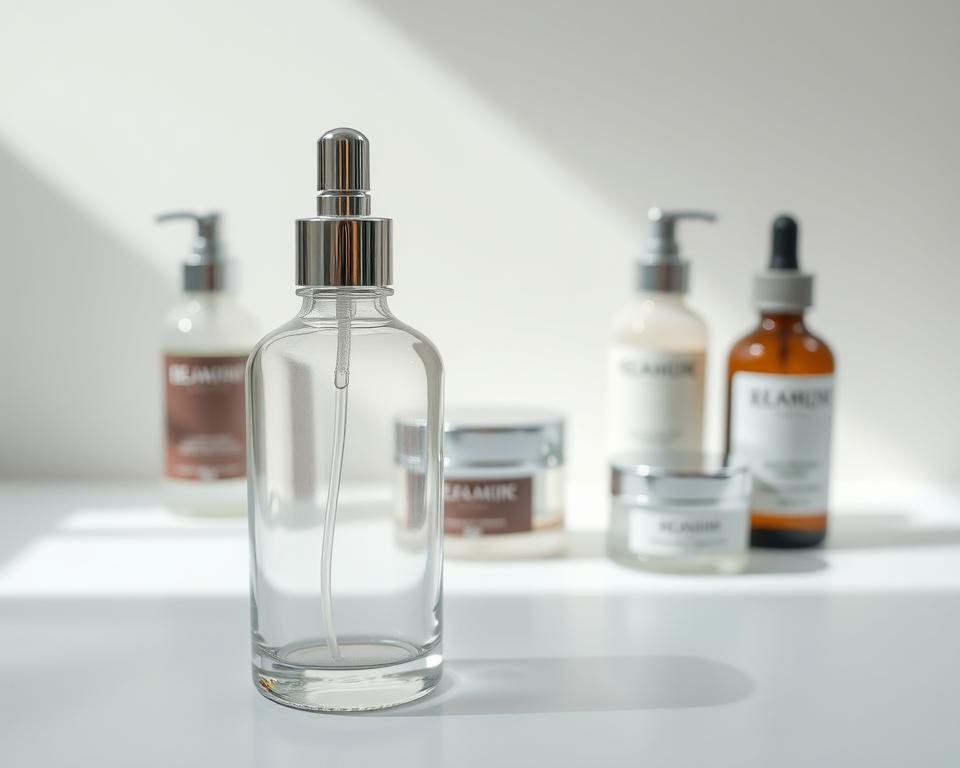
High-key techniques work best for products needing a clean, straightforward look. This includes jewelry, cosmetics, and clothing. High-key photography makes these products stand out and appeal to customers. For example, it’s often used in luxury product advertising to show high quality and sophistication.
Essential Equipment for High-key Product Shots
To get perfect white background photos, you need the right tools. You’ll need a good camera, lenses, and lighting gear for high-quality shots.
Choosing the right equipment is key for product photography. It improves your photo quality and makes your work easier. This lets you focus more on creativity.
Cameras that Work Best
A camera with manual controls and high image quality is best for product photos. I suggest using a DSLR or mirrorless camera. They offer the quality and flexibility needed for professional shots.
Look for cameras with high resolution, dynamic range, and RAW shooting. These features help you edit your photos better, making them look great.
Lenses to Consider
The right lens is important for product photos. Use a macro lens or a prime lens with a wide aperture. They give sharp images and help your product pop against the white.
Also, choose lenses with little distortion. This is key for commercial photos, where accuracy matters a lot.
Lighting Gear Recommendations
Lighting is key for high-key product photos. You’ll need a good lighting setup for a flawless white background. Use softbox lights or a light tent for soft, even light.
Don’t forget reflectors and diffusers to control the light. They help you fine-tune your lighting and make your product look great.
With the right equipment and knowledge, you can improve your high-key product shots. This will take your commercial photography to the next level.
Setting Up Your Shooting Space
A well-prepared shooting space is key to great high-key product photography. To get stunning high-key product photos, focus on your shooting environment’s details.
Choosing the Right Background
The background is very important in high-key product photography. A seamless white background is often the best choice for a clean look. You can use a seamless paper roll or a lightbox for this. Make sure the background is smooth and wrinkle-free to avoid distractions.
For more info on starting with high-key photography, check out this resource.
Ideal Lighting Conditions
Good lighting is essential for high-key product photography. Soft, diffused light is key to a high-key look. You can mix natural and artificial light for the best effect. Indoors, a lightbox or softbox can help create soft, even lighting.
- Use a lightbox or softbox for soft, diffused light.
- Position your lights at a 45-degree angle to the product.
- Try different lighting ratios to get the look you want.
Creating a Clean and Clutter-free Area
A clean shooting area is vital for top-quality product photos. Remove any unnecessary items from the area to avoid distractions. Make sure the product is the main focus.

- Clear the area around your shooting space.
- Use a dust-free background and props.
- Keep your equipment organized and within reach.
Composition Techniques for High-key Shots
To make high-key product shots look great, knowing how to compose is key. Composition is the heart of photography. In high-key shots, it’s vital for showing off the product and telling a story through images.
There are many ways to compose high-key shots. Let’s explore some top methods to boost your product photos.
Rule of Thirds in High-key Photography
The rule of thirds is a basic technique. It divides the image into thirds both ways, making nine parts. Placing your product on these lines or where they meet can make your shot look better.
- Align your product with the grid lines for a more dynamic look.
- Put key features or elements at the intersection points for emphasis.
- Try different placements to find the best composition for your product.
Balancing Elements in the Frame
It’s important to balance elements in your shot. In high-key photos, make sure the product is the focus. Other elements should enhance it without taking away from it.
Tips for balancing elements:
- Choose a clean, simple background to avoid clutter.
- Pick props that match the product and add context.
- Consider the negative space around the product for a sense of room.
Using Negative Space Effectively
Negative space is the area around and between subjects. In high-key shots, it can make the product stand out. It adds a touch of simplicity and elegance.
Effective use of negative space involves:
- Keeping the background clean and simple.
- Using a shallow depth of field to blur the background and highlight the product.
- Try different product placements to find the best negative space use.
Mastering Lighting Techniques
Lighting is more than just making your product visible. It’s about setting a mood that shows off its best sides. High-key product photography aims for bright, even light. This kind of light reduces shadows and highlights details.
Choosing Between Natural and Artificial Light
You have two main choices for lighting: natural and artificial. Natural light is soft and can be flattering. But, it’s not always steady because of weather and time of day. Artificial light, on the other hand, lets you control the light’s intensity and direction.
For commercial photography, artificial light is often better. It ensures consistency in your shots.
I mix natural and artificial light for the best results. For example, placing your product near a window adds soft natural light. Artificial lights then fill in shadows and add depth.
Positioning Your Lights for the Best Effect
Where you place your lights is as important as the type of light. For a high-key effect, position lights to avoid harsh shadows. Using multiple lights can create a soft, even glow.
Key considerations for positioning your lights include:
- The distance between the light source and your product
- The angle of the light relative to your product
- The use of light modifiers like softboxes or umbrellas to soften the light
Reflectors and Diffusers: Why They Matter
Reflectors and diffusers are key in high-key product photography. Reflectors bounce light onto shadowed areas. Diffusers soften harsh light and reduce reflections.
Using reflectors and diffusers balances and controls your lighting. This improves your product photos’ quality and gives you more creative freedom.
In conclusion, mastering lighting is vital for high-quality product photos. Knowing the benefits and drawbacks of different lights and how to position them can greatly enhance your commercial photography.
Selecting the Right Props
Props are key to making your high-key product photos stand out. They add context and create a lifestyle feel. In e-commerce, the right props can turn a good photo into a great one.
How Props Can Enhance Your Shots
Props bring a story or emotion to your photos. For example, a flower or a simple bookmark next to a product can connect with buyers. The goal is to match the props with the product without taking over.

Choosing Colors that Pop
Choosing the right colors for props is important. You want colors that stand out against a white background. Pick colors that complement your product and create a nice contrast. A bold-colored prop can add a pop of color to a minimalist product.
Keeping Props Simple and Relevant
Keep your props simple and relevant in high-key photography. Too many props can distract from the product. Choose a few props that tell a story or add context. For a coffee mug, a few coffee beans or a saucer can enhance the image without overwhelming it.
By choosing the right props, you can make your high-key product photos more engaging. This will attract your audience in the United States and worldwide.
Editing Your High-key Photos
To get clean product shots, editing is key. It’s where you improve the quality, fix issues, and make sure your images look professional product images.
Editing is more than fixing errors. It’s a chance to take your product photography to the next level. With the right tools and techniques, you can make your products pop and grab the attention of customers.
Essential Software for Editing
Choosing the right software for editing high-key product photos is important. Adobe Photoshop and Lightroom are top picks for pros. They have lots of tools and features to improve your images.
Adobe Photoshop is great for detailed editing and retouching. Lightroom is better for making big changes and editing lots of photos at once, making your work easier.
Basic Adjustments for High-key Finish
To get a high-key finish, you need to make a few basic changes. First, check if your image is well-exposed. Then, tweak the brightness and contrast to make it lighter and clearer.
Also, focus on the white balance. High-key images look best with a neutral or cool white balance. This keeps the image clean and modern.
- Adjust exposure and contrast
- Set appropriate white balance
- Enhance clarity and texture
Tips for Effective Retouching Techniques
Retouching is a key part of editing high-key product photos. It’s about removing any flaws, dust, or unwanted details that can take away from the product’s look.
To retouch well, use the clone stamp and healing brush tools in Photoshop. These tools help you remove spots and keep the image looking natural.
Remember, the goal of retouching is to improve the product, not change it. Be subtle and focus on removing distractions, not altering the product’s true look.
Real-Life Examples of High-key Product Shots
To master high-key product shots, it’s key to look at successful campaigns and expert tips. This will help you understand what makes high-key product photography work well. You’ll also learn how to use these ideas in your own work.
Analyzing Successful Campaigns
Successful high-key product shot campaigns have some common traits. They often have clean and minimalist compositions. This makes the product the main focus. Here are a few examples:
- Apple’s Product Photography: Apple is known for its sleek, minimalist style. They use high-key techniques to show off their products’ elegance.
- Fashion Brands: Luxury fashion brands use high-key shots to show sophistication and high quality.
- Beauty and Cosmetics: In the beauty and cosmetics world, high-key photography is used to highlight product details and textures.
Learning from Industry Experts
Product photography experts share valuable tips through workshops, blogs, and social media. Learning from them can improve your skills. Some key tips include:
- The importance of proper lighting for a high-key effect.
- Using reflectors and diffusers to control light and avoid harsh shadows.
- The role of post-processing techniques in perfecting the high-key look.
My Personal Favorites
I’ve seen many high-key product shots that inspire me. One favorite is a jewelry brand’s campaign. They used high-key photography to show off their jewelry’s details. A clean white background and soft lighting made the visuals stunning.
By studying real-life examples and learning from experts, you can enhance your product photography skills. You’ll create images that grab your audience’s attention.
Common Mistakes to Avoid
Working with high-key product photography, I’ve seen common errors that can ruin your photos. To get high-quality product photos, you need to pay attention to details and know what to avoid.
Shooting with a white background can lead to mistakes. We’ll look at common errors to steer clear of in white background photography.
Overexposure Pitfalls
One big challenge in high-key photography is avoiding overexposure. Too much light can make highlights too bright and lose detail. Finding the right balance between light and shadow is key.
A recent article on common product photography mistakes warns about overexposure. It’s critical when dealing with reflective surfaces or light-colored products. Adjust your lighting to get balanced, detailed images.

Neglecting Shadows and Highlights
High-key photography focuses on bright, even light. But, shadows and highlights are also important. Ignoring them can make your photos look flat and dull.
To add depth, look for shadows and highlights. Adjust your lights or use reflectors to enhance your images.
Distractions in the Frame
Keeping your composition clean is vital. Distractions can pull the viewer’s eye away from the product. This can ruin the image’s impact.
Stage your shot carefully and remove any extra elements. A simple, focused composition makes your images more appealing and effective.
“A cluttered background is a cluttered mind.” This quote shows the importance of simplicity in product photography. A clean composition helps showcase your product better.
Tips for Making Your Photos Stand Out
Creating stunning high-key product photos is more than just technical skills. It’s the creative touches that make a big difference. As someone who’s worked a lot in e-commerce photography, I’ve learned this.
To make your product photography better, try these techniques. They can give your images a professional look.
Adding Texture and Depth
Adding texture and depth to your photos can make them stand out. Use props or backgrounds that match your product. For example, a smooth product on a textured fabric looks great.
Annie Leibovitz said, “The most important thing in photography is to be willing to see.” Being open to new ideas can lead to unique and captivating images.
Using Color Theory in High-key Photography
Color theory is key to making your product photos pop. Choose colors that go well with your product for a harmonious look. A bold background can make your product really stand out.
- Select a color palette that fits your brand.
- Try different hues to find the best contrast.
- Think about how colors affect your audience’s feelings.
Engaging Your Audience through Storytelling
Storytelling is powerful in e-commerce photography. It can connect with your audience on a deeper level. Use props, models, or settings that show a certain lifestyle or emotion.
“A great photograph is one that fully and totally communicates what one feels about what is being photographed in the most beautiful way possible, and that is what makes it a successful photograph.” –
By using these techniques in your high-key product photography, you’ll create images that stand out. They will also connect with your audience.
Showcasing Your High-key Product Shots
Now that you have your high-key product images, let’s explore the best ways to showcase them. Displaying your clean product shots and professional product images well can really boost your brand’s visibility and appeal.
First, find the right places to show your work. This helps you reach more people and sell more.
Ideal Platforms for Display
Several platforms are great for showing off your high-key product photography:
- Your Website: A special section for your product images can make a big difference.
- Social Media: Instagram and Facebook are perfect for sharing your work.
- Online Marketplaces: High-quality images are essential on platforms like Amazon or Etsy if you sell online.
- Print Materials: Don’t overlook the impact of catalogs or brochures.
Creating a Cohesive Portfolio
A cohesive portfolio is vital for a strong impression. Here are some tips:
- Keep a consistent style and tone in all your images.
- Showcase your best work to highlight your skills.
- Keep updating your portfolio to stay fresh and relevant.
Sharing on Social Media: Best Practices
Social media is a great way to show off your professional product images. To get the most out of it:
- Post often to keep your audience interested.
- Use the right hashtags to get seen more.
- Interact with your followers by replying to comments and messages.
By following these tips, you can showcase your high-key product shots effectively. This will help boost your brand’s presence in the market.
Conclusion and Final Thoughts
Mastering high-key product photography is a journey. It takes patience, practice, and creativity. We’ve looked at how to capture stunning shots, from the technical side to experimenting with techniques.
Reflecting on the Process
My journey in high-key photography has shown me the importance of detail. Every step, from setting up lighting to editing, is key to getting professional results.
Experimenting with High-key Techniques
I encourage you to try out different high-key techniques. They can make your product shots stand out. Whether for e-commerce or social media, high-key shots can boost your brand’s look.
Sharing Your Work
I’m excited to see your high-key photography projects. Sharing your work and exploring creativity will improve your skills. It will also help shape the future of product photography.